Documentation

Keycloak
The following section describes how to run Imixs-Office-Workflow with Keycloak in a local dev environment.
To start the environment including a Keycloak server and Imixs-Office-Workflow run :
$ docker-compose -f docker/docker-compose-keycloak up
Also it is necessary for a local test to create the local hostname keycloak.imixs.local pointing to the host loopback interface 127.0.0.1
You can access the keycloak server via
http://keycloak.imixs.local:8084
For a first login use the userid admin with the password adminadmin. You can change these user settings in the docker-compose.yaml file.
Setup a Client Realm
First you need to setup a new client Realm within the keycloak server.
Create a new realm with the name imixs-office-workflow
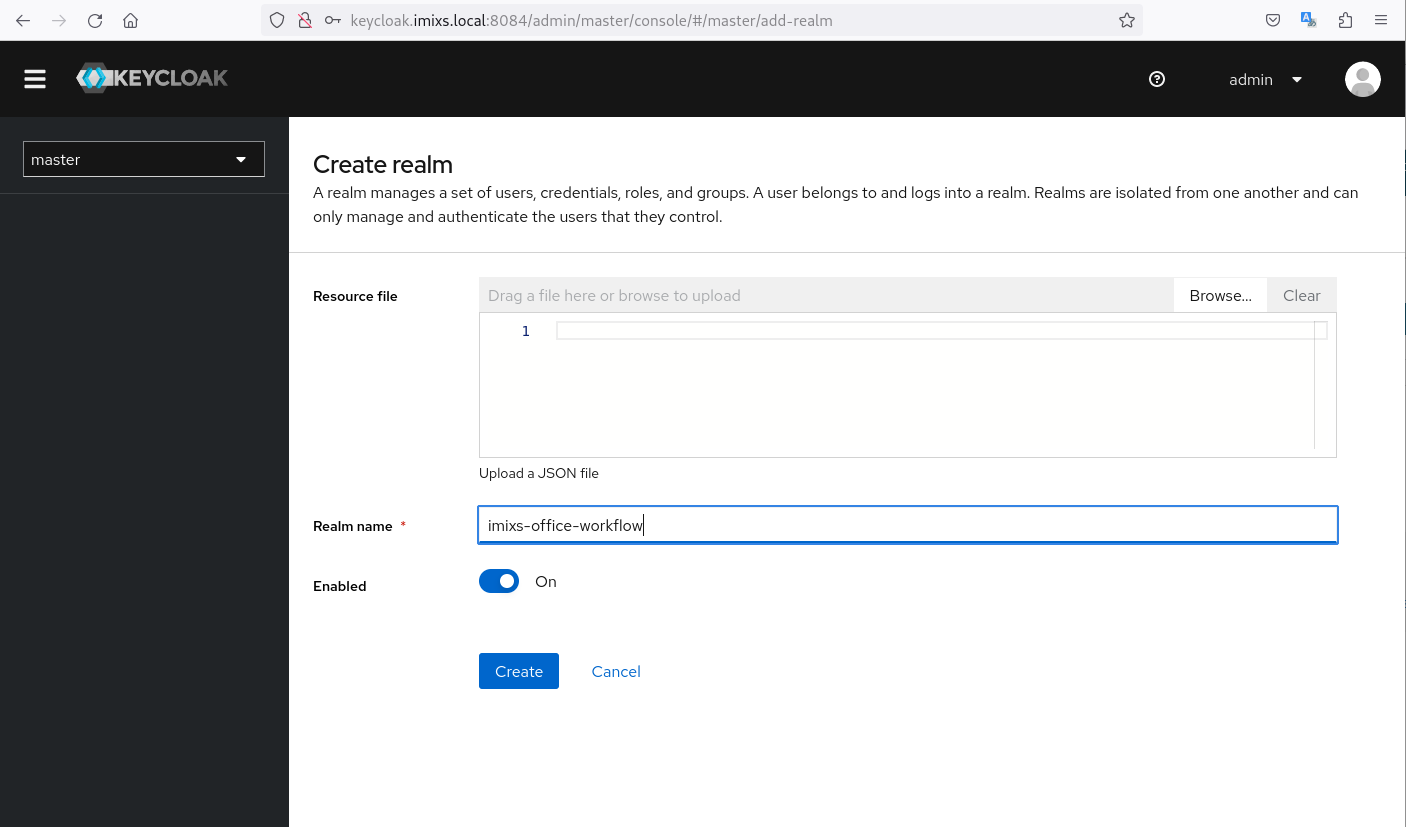
This generates a new realm within keycloak to manage users and groups.
Setup a Client
Next you need to create a client with the name imixs:
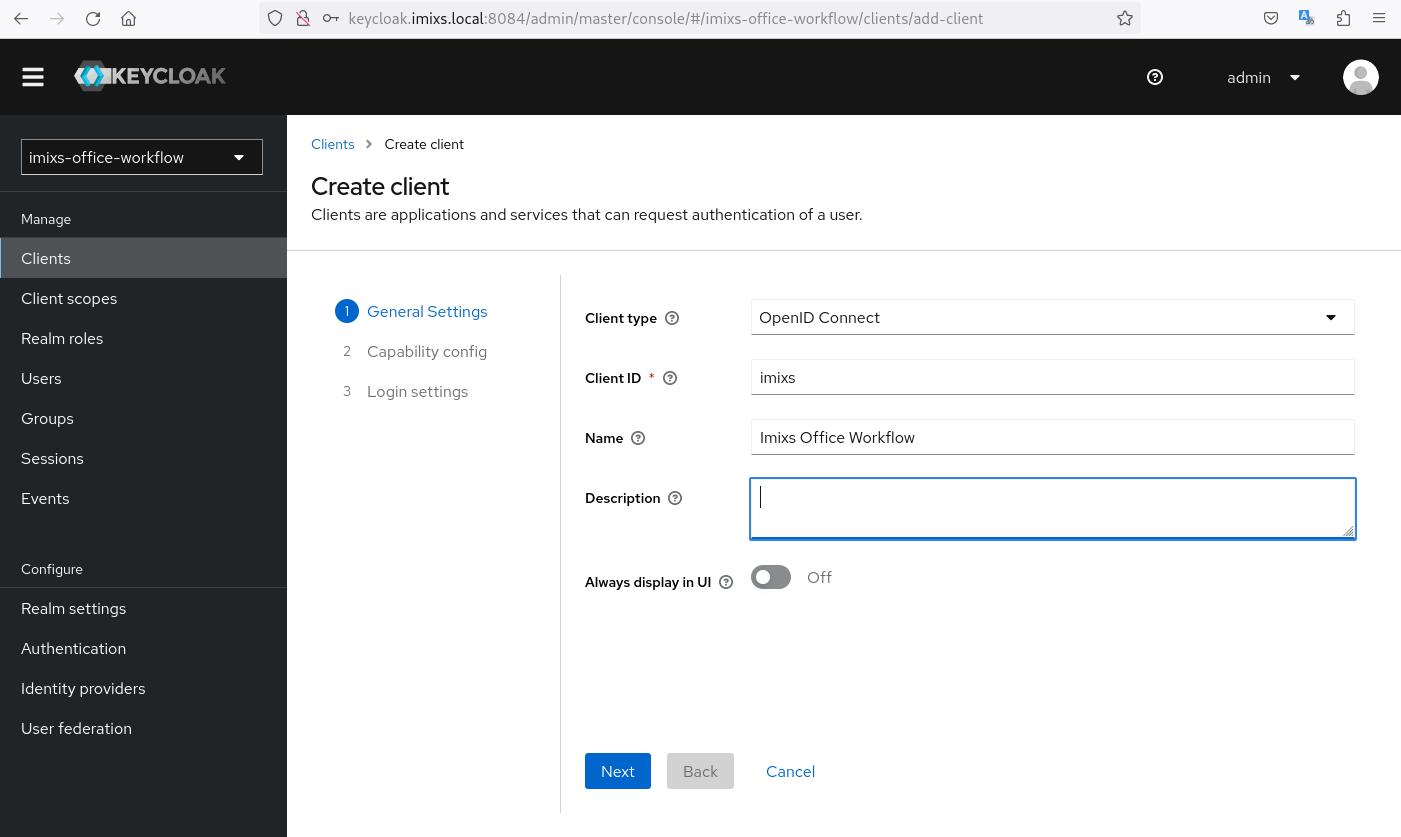
The client will be be used by Imixs-Office-Workflow to login the user. The client-id is the client identifier for the application.
Click ‘Next’ and activate the option ‘Client authentication’. This will generate a client secret.

Click ‘Next’ and add the redirect URI http://localhost:8080/*

To test the OIDC provider capabilities you can request the configuration URL in your web browser:
http://keycloak.imixs.local:8084/realms/imixs-office-workflow/.well-known/openid-configuration
Create Roles
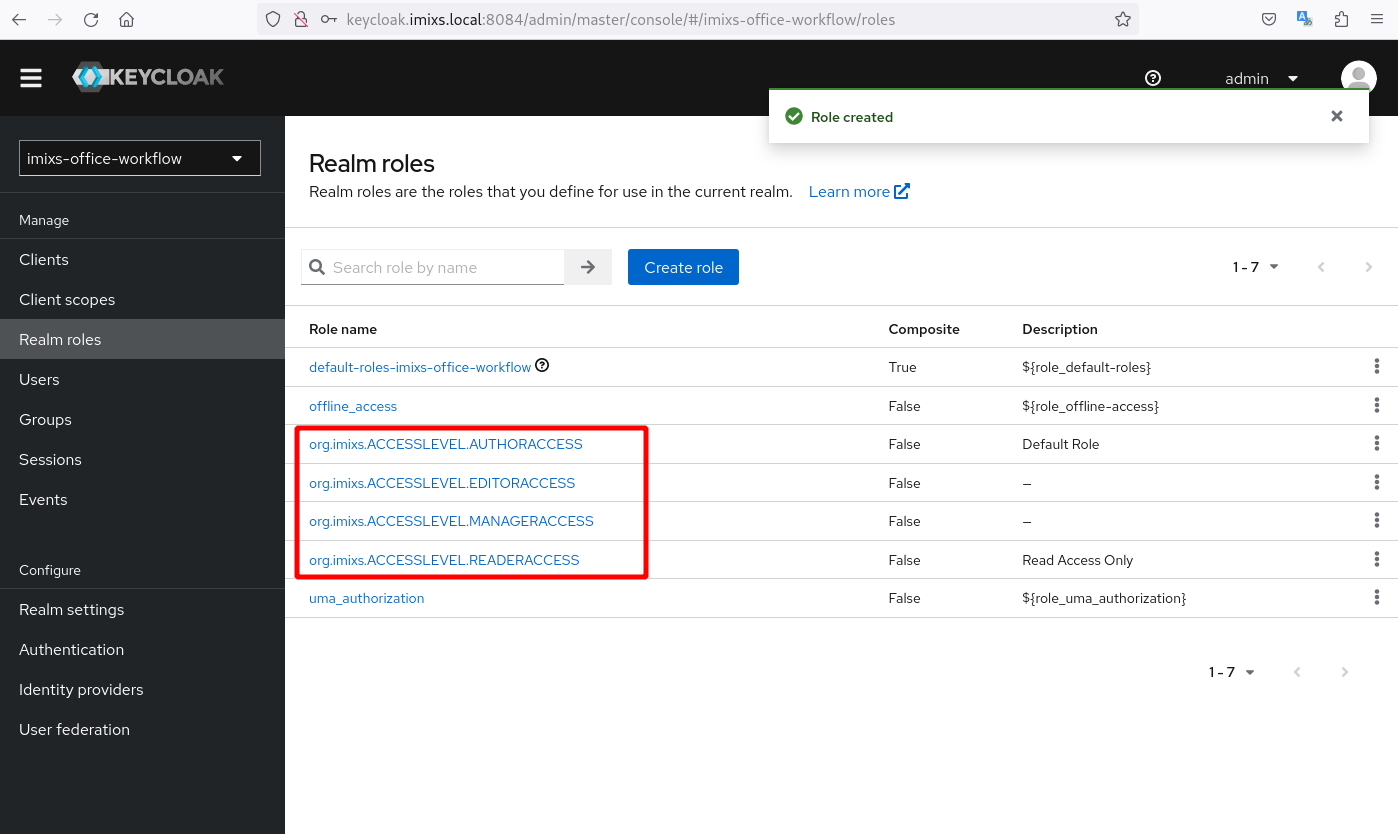
Next create the following Realm Roles
- org.imixs.ACCESSLEVEL.READERACCESS
- org.imixs.ACCESSLEVEL.AUTHORACCESS
- org.imixs.ACCESSLEVEL.AUTHORACCESS
- org.imixs.ACCESSLEVEL.MANAGERACCESS
Create Users
Now you can create new User Accounts

and assign these users to one of the roles:
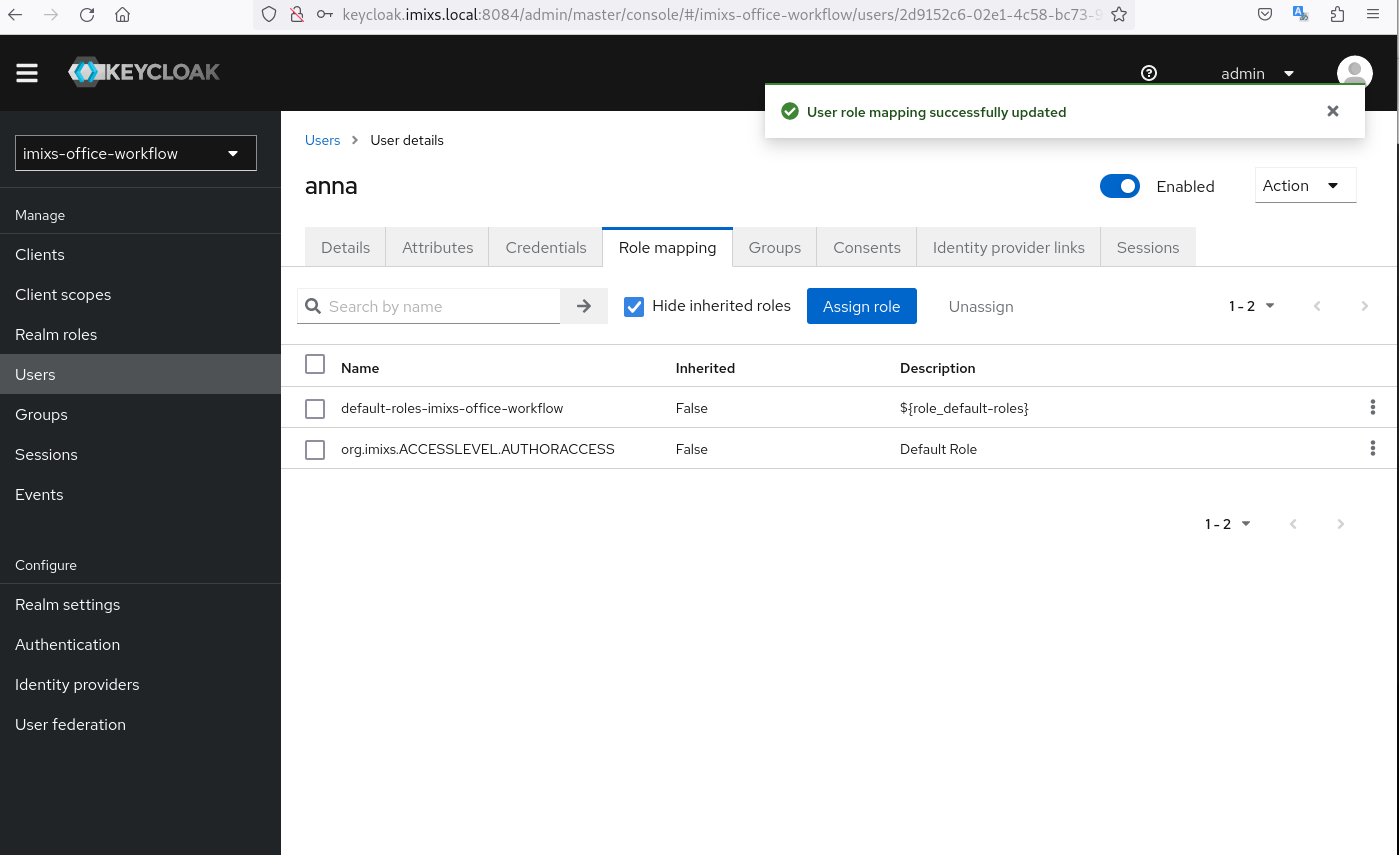
Also don’t forget to set the password for the new user via the tab ‘Credentials’.
Add a Role Group Mapper
The OpenID Client expects the roles in the scope ‘groups’. This scope is not activated by default in Keycloak. To do this you just need to create a group mapper
Choose the menue ‘Client Scopes’ and select the scope named ‘roles’ from the list:
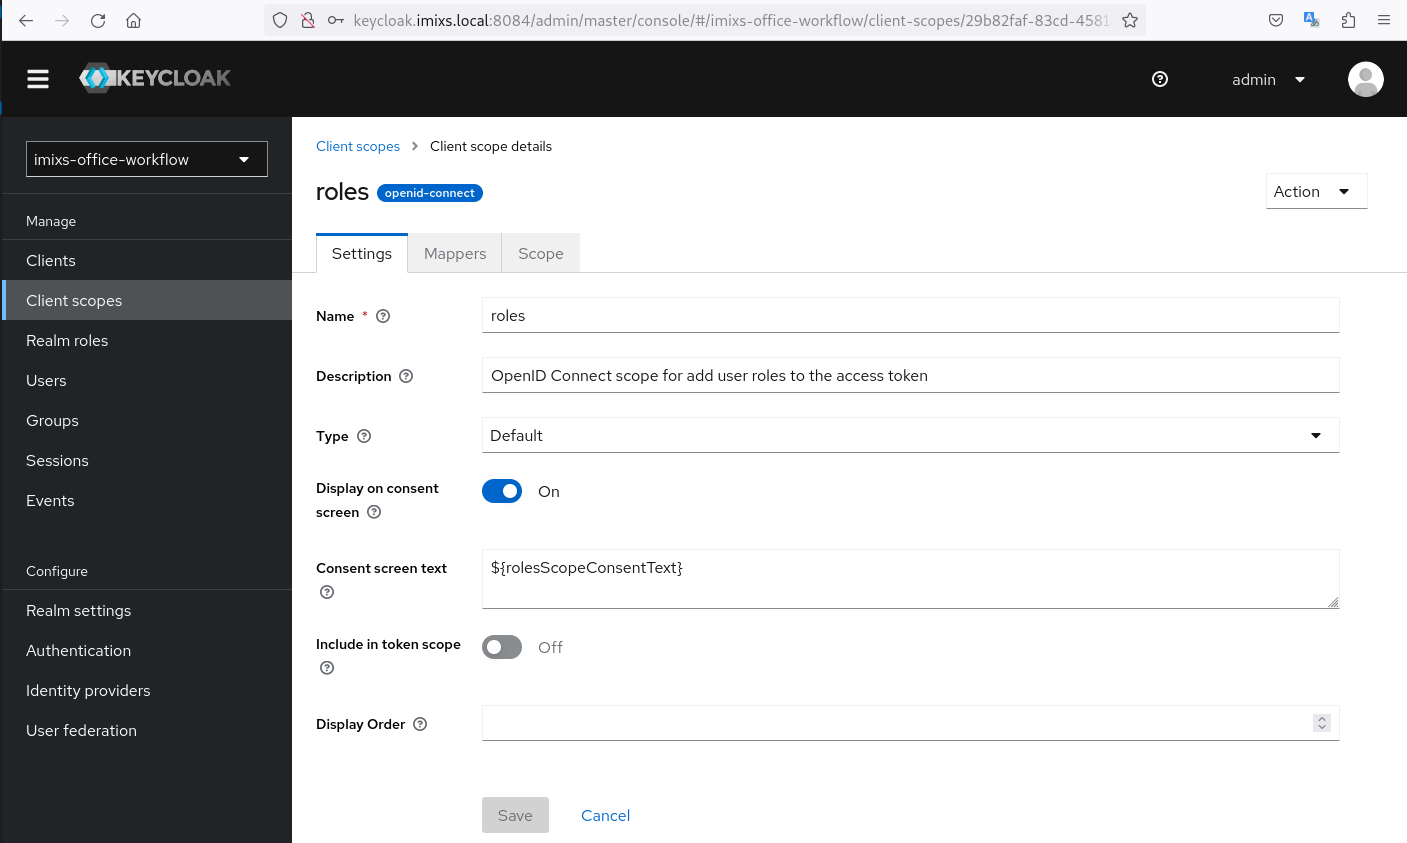
Next click on the tab ‘Mappers’ and add a new Mapper from the predefined mappers and choose ‘groups’

Thats it, now the roles are provided in the scope ‘groups’.
Use OIDC with Keycloak and Imixs-Office-Workflow
OpenID Connect is an identity layer on top of the OAuth 2.0 protocol. OpenID Connect makes it possible for a client to verify a user’s identity based on authentication that’s performed by an OpenID provider.
WildFly 25, which is used by the latest version of Imixs-Office-Workflow, added the ability to secure applications using OpenID Connect, without needing to make use of the Keycloak client adapter. To integrate Keycloak, WildFly 25 introduced a new elytron-oidc-client subsystem that scans deployments to check if the OpenID Connect (OIDC) authentication mechanism is needed. If the subsystem detects that the OIDC mechanism is required for a deployment, the subsystem will activate this authentication mechanism automatically. This feature makes it easy to connect Imixs-Office-Workflow with Keycloak.
Aktivating the OIDC Module
To activate OIDC in Imixs-Office-Workflow you need to build the application with the maven profile ‘oidc’
$ mvn clean install -Pauth-oidc
This will build a version including the library imixs-office-workflow-oidc-*.jar. This optional module provides the OIDC Security bean with the corresponding ‘@OpenIdAuthenticationMechanismDefinition’.
Note: Make sure that the application deployment descriptor jboss-web.xml did not set the <security-domain>! This will overwrite the OIDC setting and will break the authentication flow.
The configuration of the OpenID Provider Endpoint and the client secret can be done by setting the following environment variables in your Docker image:
| Environment Param | Description |
|---|---|
| OIDCCONFIG_ISSUERURI | endpoint for identity provider |
| OIDCCONFIG_CLIENTID | OIDC Client ID |
| OIDCCONFIG_CLIENTSECRET | Client secret |
| OIDCCONFIG_REDIRECTURI | Redirect URI - application address with /callback uri |
Note that the Imixs OIDC module provides a redirect servlet with the endpoint /callback this is the endpoint typically used by the identity provider as the callback uri.
The IssuerURI is the endpoint of your Keycloak sever. The client secret can be copied form the ‘credentials’ tab in your client configuration.
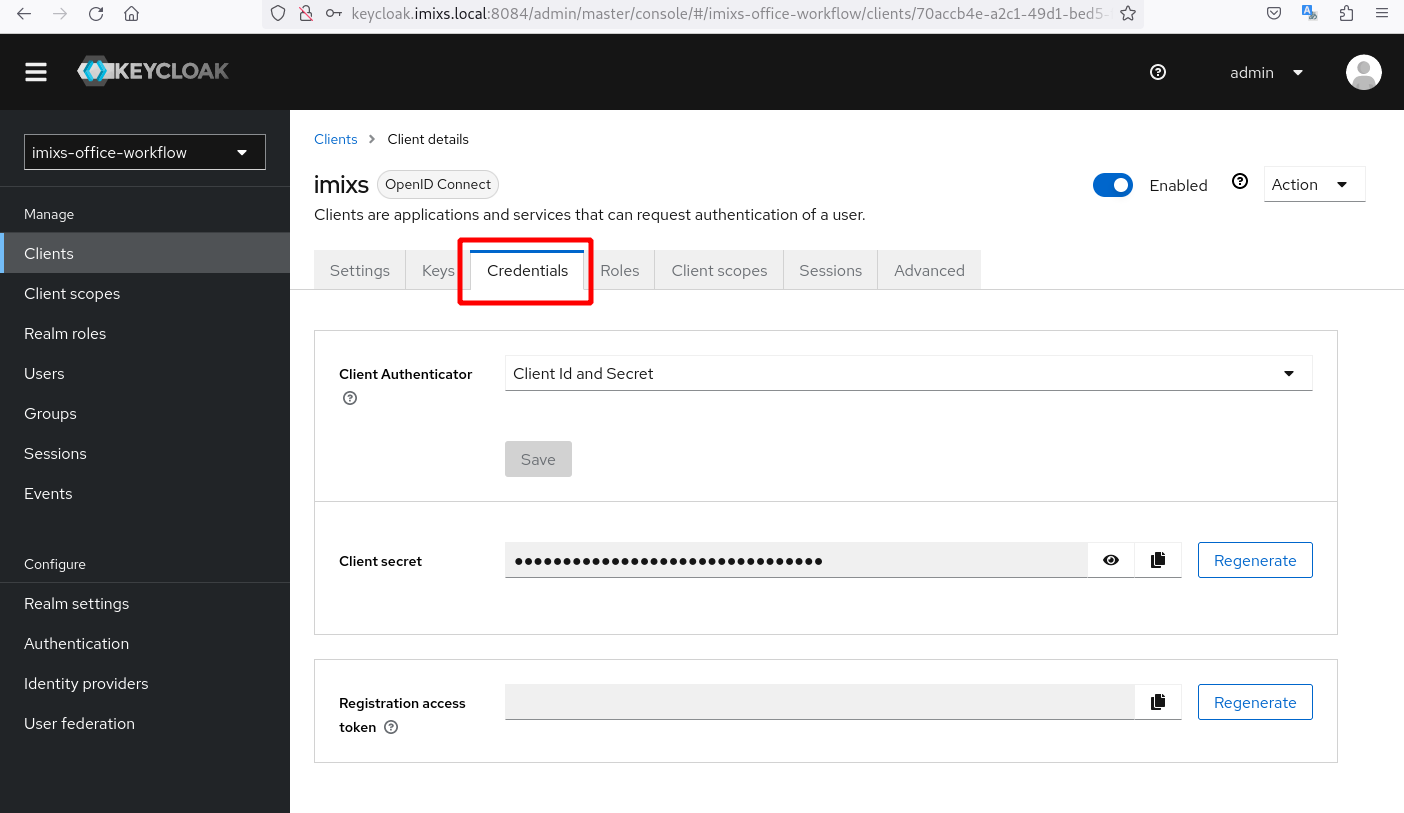
Finally redeploy your application.
Thats it.
Wildfly - Disable JASPIC
One tricky point is that by default the elytron subsystem enforces the logged user to be in the default other domain (by default application users are placed in the application-users.properties file in wildfly). The integrated-jaspi option can be set to false to avoid that.
Note: The default Docker Image form Imixs-Office-Workflow already have deactivated this option, so no changes are necessary in most cases.
If you want to set this option manually, this can be done by either editing the standalone.xml file:
 ....
 .........
        <subsystem xmlns="urn:jboss:domain:undertow:13.0" default-server="default-server" default-virtual-host="default-host" default-servlet-container="default" default-security-domain="other" statistics-enabled="${wildfly.undertow.statistics-enabled:${wildfly.statistics-enabled:false}}">
           .......
           .............
            <application-security-domains>
                <!-- Disable integrated jaspic -->
                <application-security-domain name="other" security-domain="ApplicationDomain" integrated-jaspi="false"/>
            </application-security-domains>
        </subsystem>
    .....
or with the cli-commandline tool:
$ ./jboss-cli.sh --connect --controller=remote+http://localhost:9990
$ /subsystem=undertow/application-security-domain=other:write-attribute(name=integrated-jaspi, value=false)
$ relaod
HTTPS
Make sure you are using HTTPS Listener in Wildfly (Port 8443) instead of the HTTP listener (Port 8080). The OpenID Provider typically did not accept a different protocol during the verification procedure. The HTTPS listener is enabled in Wildfly by default.
You can set the correct redirect URL with the environment parameter OIDCCONFIG_REDIRECTURI
Trouble Shooting
Disable HTTPS/SSL
Since version 24.x Keycloak increased the security to demand configured HTTPS / SSL, even when starting locally for testing. If you test keycloak locally in a docker container, you may possible run into problem when trying to login. You will see a message during login like this in your browser window:
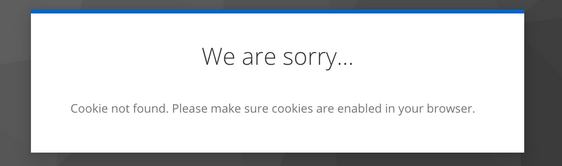
This is caused by the increased security. To disable this new security feature open a bash inside the local container and run the following commands:
/opt/keycloak/bin/kcadm.sh update realms/master -s sslRequired=NONE --server http://localhost:8080 --realm master --user admin --password adminadmin
/opt/keycloak/bin/kcadm.sh update realms/imixs-office-workflow -s sslRequired=NONE --server http://localhost:8080 --realm master --user admin --password adminadmin
This will disable HTTPS for the master realm and the realm ‘imixs-office-workflow’. The update is done inside the sql database. Restart your docker container after this change.
Kubernetes
You can run Imixs-Office-Workflow together with Keycloak on Kubernetes with real Internet Domains. Just take care about the following issues:
Setup Keycloak deployment
Make sure to set the following additional environment settings if you have a Ingress setup and your Keycloak server is running on HTTP (port 8080):
apiVersion: apps/v1
kind: Deployment
metadata:
  name: keycloak
  namespace: my-keycloak
spec:
  selector:
    matchLabels:
      app: keycloak
  replicas: 1
  template:
    metadata:
      labels:
        app: keycloak
    spec:
      containers:
        - name: keycloak
          image: quay.io/keycloak/keycloak:23.0.5
          command: ["/opt/keycloak/bin/kc.sh", "start"]
          env:
            - name: TZ
              value: CET
            - name: KEYCLOAK_ADMIN
              value: admin
            - name: KEYCLOAK_ADMIN_PASSWORD
              value: adminadmin
            - name: KC_DB
              value: postgres
            - name: KC_DB_URL
              value: "jdbc:postgresql://db/keycloak"
            - name: KC_DB_USER
              value: keycloak
            - name: KC_DB_PASSWORD
              value: adminadmin
            - name: KC_HOSTNAME_STRICT
              value: "false"
            - name: KC_HTTP_ENABLED
              value: "true" # activate HTTP
            - name: KC_HTTPS_ENABLED
              value: "false" # deactivate HTTPS
            - name: KC_PROXY
              value: "edge" # set Proxy-Modus to "edge"
            - name: KC_HOSTNAME_URL
              value: "https://my-keycloak.foo.com"
          ports:
            - containerPort: 8080
              name: keycloak
          volumeMounts:
            - name: localtime
              mountPath: /etc/localtime
              readOnly: true
      volumes:
        - name: localtime
          hostPath:
            path: /etc/localtime
This Kubernetes deployment allows you to run Keycloak in the backend via HTTP (port 8080) and do the ssl termination on the Kubernetes ingress controller only.
For the Ingress Configuration of Keycloak take care about the following nginx Ingress configuration especially for the annotations used in this example:
kind: Ingress
apiVersion: networking.k8s.io/v1
metadata:
  name: keycloak-tls
  namespace: my-keycloak
  annotations:
    cert-manager.io/cluster-issuer: "letsencrypt-prod"
    nginx.ingress.kubernetes.io/proxy-body-size: 100m
    nginx.ingress.kubernetes.io/proxy-buffer-size: "128k"
spec:
  ingressClassName: nginx
  tls:
    - hosts:
        - my-keycloak.foo.com
      secretName: tls-sso
  rules:
    - host: my-keycloak.foo.com
      http:
        paths:
          - path: /
            pathType: Prefix
            backend:
              service:
                name: keycloak
                port:
                  number: 8080
The annotation proxy-buffer-size is important here. Find also details here
Setup Imixs-Office-Workflow deployment
Because Keycloak expects a HTTPS endpoint, you should configure your wildfly server - running Imixs-Office-Workflow - in a way where you use the HTTPS Listener. This listener is activated per default in Wildfly on port 8443. But Wildfly uses of course a so called ‘self-signed’ certificate. This makes it necessary to configure the Ingress Controller in the following way to skip ssl-verification.
apiVersion: v1
kind: Service
metadata:
  name: imixs-office-workflow
  namespace: office-test
spec:
  ports:
    - name: web
      port: 8443
    - name: metrics
      port: 9990
  selector:
    app: imixs-office-workflow

---
kind: Ingress
apiVersion: networking.k8s.io/v1
metadata:
  name: office-tls
  namespace: office-test
  annotations:
    cert-manager.io/cluster-issuer: "letsencrypt-prod"
    nginx.ingress.kubernetes.io/backend-protocol: "HTTPS"
    nginx.ingress.kubernetes.io/ssl-verify: "false"
spec:
  ingressClassName: nginx
  tls:
    - hosts:
        - my.office-workflow.foo.com
      secretName: tls-office
  rules:
    - host: my.office-workflow.foo.com
      http:
        paths:
          - path: /
            pathType: Prefix
            backend:
              service:
                name: imixs-office-workflow
                port:
                  number: 8443
This configuration tells the nginx Ingress Controller to not verify the SSL certificate and to use HTTPS as the backend protocol. So the important settings here are:
    nginx.ingress.kubernetes.io/backend-protocol: "HTTPS"
    nginx.ingress.kubernetes.io/ssl-verify: "false"
Additional Information
Find more information about Keycloak and Wildfly here: